RoboGleam:
A Smart House Cleaning Robot (Economic Prototype)
Introduction

In this project, I engineered and coded a Arduino based Floor Cleaning Robot as an economic prototype to the commercially available vacuum cleaners. The project involved the implementation of versatile operational modes, including manual and automatic functionalities, with the robot functioning adeptly as an obstacle-avoiding bot and demonstrating efficient path-tracing capabilities across rooms. The design enabled it to thoroughly vacuum and wet clean house floors using a small water tank placed above it along with the high speed motors cleaning the floors efficiently.
Methodology
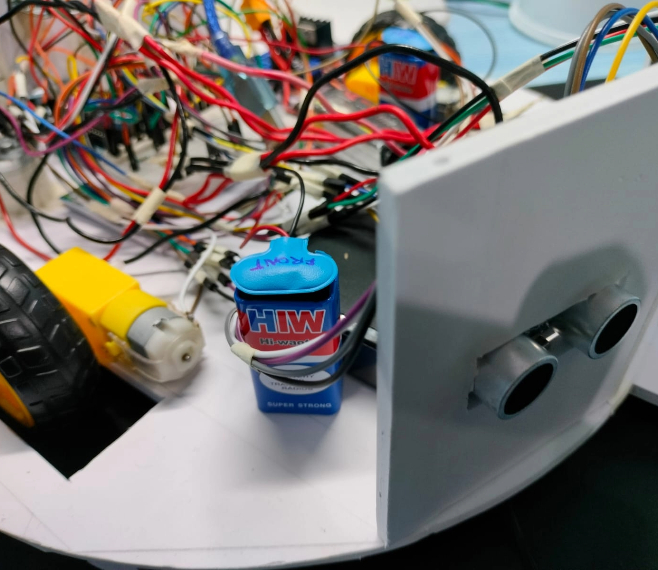
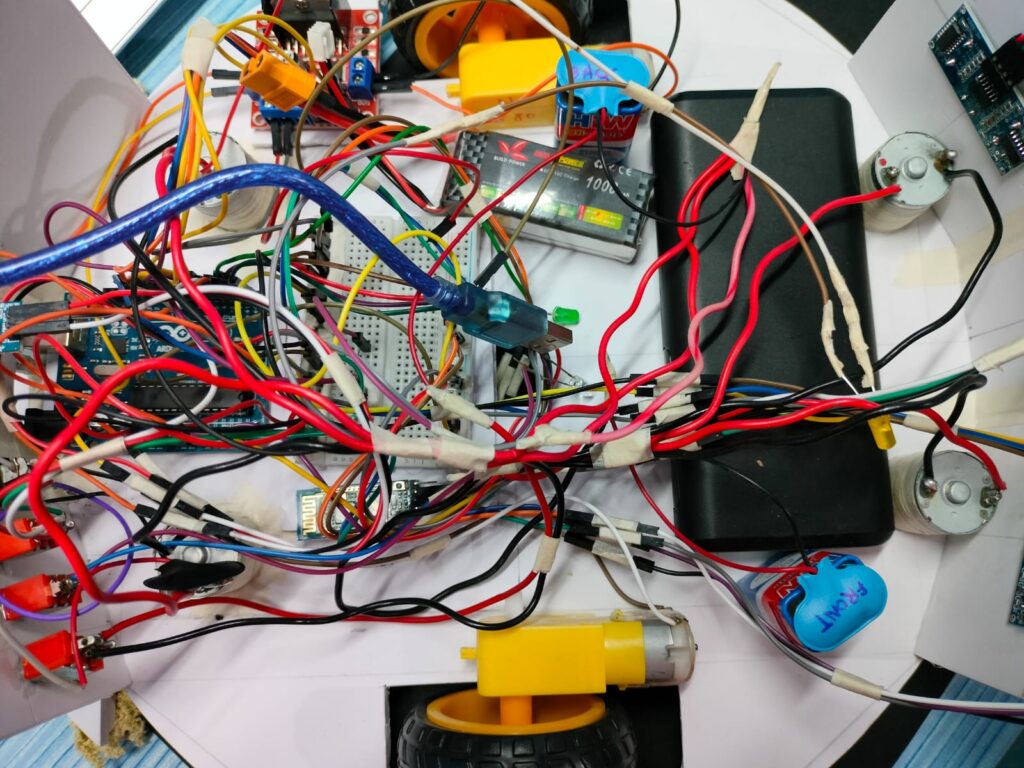
Hardware/Electronics: The electronic components included in the system were an Arduino Mega microcontroller board, six DC motors, an L298N motor driver, a HC-05 Bluetooth module, three ultrasonic sensors, two IR sensors, and batteries for power. The interconnections were established using a mini breadboard, incorporating switches and status LEDs to display and switch between operational modes. The robot chassis/body was crafted using foam sheets. The front motors were equipped with a sweeping head, directing dust towards the vacuum inlet while the rear motors had a soft scrub attached for floor cleaning, complemented by a water pipe outlet connected from the tank above.


Programming: Below is the code for the Smart House Cleaning Robot to operate in Manual and Automatic Modes. (The code for path tracing is not included in the code below)
/*

Project Name: RoboGleam: A Smart House Cleaning Robot (Economic Prototype)
Author: Dhyey Shah
Date Modified: 26th July, 2022

*/

/*-----------------------------------------------------------------------------START OF MAIN PROGRAM------------------------------------------------------------------------------*/

// Include Libraries
#include <NewPing.h>

// Defining Variables
#define RX 0
#define TX 1
#define irSensorFront 2
#define irSensorBack 3
#define modeSwitch 4
#define ENA 6                  // Enable Pin for Right Motor
#define ENB 5                  // Enable Pin for Left Motor
#define ledGreen A0
#define ledWhite 7
#define in1 8                  // Right Motor Forward
#define in2 9                  // Right Motor Backward
#define in3 10                 // Left Motor Forward
#define in4 11                 // Left Motor Backward
#define echoUS1 12
#define trigUS1 13
#define echoUS2 A3
#define trigUS2 A2
#define echoUS3 A5
#define trigUS3 A4

// #define servoAngle 105

char val;


// Creating Object Instances for Peripherals
NewPing sonar1(trigUS1, echoUS1, 300);
NewPing sonar2(trigUS2, echoUS2, 200);
NewPing sonar3(trigUS3, echoUS3, 200);


/*-------------------------------------------------------------------------------------*/


void setup() {

  Serial.begin(9600);

//  servo.attach(servoMotor);
//  servo.write(servoAngle);

  pinMode(ledGreen, OUTPUT);
  pinMode(ledWhite, OUTPUT);
  pinMode(in1, OUTPUT);
  pinMode(in2, OUTPUT);
  pinMode(in3, OUTPUT);
  pinMode(in4, OUTPUT);
  pinMode(ENA, OUTPUT);
  pinMode(ENB, OUTPUT);
  analogWrite(ENA, 145);
  analogWrite(ENB, 255);

  pinMode(irSensorFront, INPUT);
  pinMode(irSensorBack, INPUT);
  pinMode(modeSwitch, INPUT_PULLUP);

  digitalWrite(ledGreen, LOW);
  digitalWrite(ledWhite, LOW);

}

void loop() {

  if (digitalRead(modeSwitch) == HIGH){
    digitalWrite(ledGreen, HIGH);
    digitalWrite(ledWhite, LOW);
    automatic();
    }
  else if (digitalRead(modeSwitch) == LOW){
    digitalWrite(ledWhite, HIGH);
    digitalWrite(ledGreen, LOW);
    manual();
    }

  // Controlling both Sweeper & Scrubber Motors ( x4 Motors ) with 2 seperate Switches & 2 Batteries.

}


/*----------------------------PRIMARY USER FUNCTIONS-------------------------------*/


void automatic(){

  unsigned int dist_val1 = readDistance1();
  unsigned int dist_val2 = readDistance2();
  unsigned int dist_val3 = readDistance3();

  if ( dist_val1 <= 15 && dist_val1 != 0 ){

      Serial.println("Nearby Object Detected in Centre !");
      stopRobot();
      delay(150);
      moveBack();
      delay(400);
      stopRobot();
      delay(150);

      if ( dist_val2 > dist_val3){                  // dist_val2 for Sensor on Left, dist_val3 for Sensor on Right

          turnLeft();
          delay(400);
          stopRobot();
          delay(150);

        }

       else if ( dist_val2 < dist_val3){               // dist_val2 for Sensor on Left, dist_val3 for Sensor on Right

          turnRight();
          delay(400);
          stopRobot();
          delay(150);

        }

  }

  else if ( dist_val2 <= 15 && dist_val2 != 0 ){       // dist_val2 for Sensor on Left, dist_val3 for Sensor on Right

          Serial.println("Nearby Object Detected on Left Side !");
          stopRobot();
          delay(150);
          moveBack();
          delay(150);
          turnRight();
          delay(400);
          stopRobot();
          delay(150);

    }

   else if ( dist_val3 <= 15 && dist_val3 != 0 ){      // dist_val2 for Sensor on Left, dist_val3 for Sensor on Right

          Serial.println("Nearby Object Detected on Right Side !");
          stopRobot();
          delay(150);
          moveBack();
          delay(150);
          turnLeft();
          delay(400);
          stopRobot();
          delay(150);

    }

  else {

      moveForward();

    }

}

void manual(){

  unsigned int dist_value1 = readDistance1();

  if (Serial.available() > 0){

    stopRobot();
    val = Serial.read();
    Serial.println("The Bluetooth Value = ");
    Serial.println(val);
    delay(10);

  if ( val == '1' ){
      if ( dist_value1 <= 15 && dist_value1 != 0 ){
        stopRobot();
      }
      else {
        moveForward();
        }
    }

  else if ( val == '2' ){
      moveBack();
    }

  else if ( val == '3' ){
      turnRight();
    }

  else if ( val == '4' ){
      turnLeft();
    }

  else if ( val == '5' ){
      stopRobot();
    }

  }

}

/*----------------------------SECONDARY USER FUNCTIONS-------------------------------*/


unsigned int readDistance1(){

    unsigned int dist1 = sonar1.ping_cm();
    Serial.print("Distance is: ");
    Serial.println(dist1);
    return dist1;
    delay(10);
}

unsigned int readDistance2(){

    unsigned int dist2 = sonar2.ping_cm();
    Serial.print("Distance on Left is: ");
    Serial.println(dist2);
    return dist2;
    delay(10);
}

unsigned int readDistance3(){

    unsigned int dist3 = sonar3.ping_cm();
    Serial.print("Distance on Right is: ");
    Serial.println(dist3);
    return dist3;
    delay(10);
}

void moveForward(){

    if (digitalRead(irSensorFront) == HIGH){          // Detects Floor below in front, if Low = Stops
        stopRobot();
        delay(50);
      }
    else {
        digitalWrite(in1, LOW);
        digitalWrite(in2, HIGH);
        digitalWrite(in3, LOW);
        digitalWrite(in4, HIGH);
      }

}

void moveBack(){

    if (digitalRead(irSensorBack) == LOW){           // Detects Object behind at back, if High = Stops
        stopRobot();
        delay(50);
      }
    else{
        digitalWrite(in1, HIGH);
        digitalWrite(in2, LOW);
        digitalWrite(in3, HIGH);
        digitalWrite(in4, LOW);
      }

}

void turnRight(){

    digitalWrite(in1, HIGH);
    digitalWrite(in2, LOW);
    digitalWrite(in3, LOW);
    digitalWrite(in4, HIGH);
    delay(300);

}

void turnLeft(){

    digitalWrite(in1, LOW);
    digitalWrite(in2, HIGH);
    digitalWrite(in3, HIGH);
    digitalWrite(in4, LOW);
    delay(300);

}

void stopRobot(){

    digitalWrite(in1, LOW);
    digitalWrite(in2, LOW);
    digitalWrite(in3, LOW);
    digitalWrite(in4, LOW);

}Operation: The manual mode allows the user to navigate the robot through the bluetooth mobile app across the floor and switch on and off the cleaning motors and waterflow. This is useful for specific or targeted cleaning purposes and saves resources. The Automatic mode empowers the robot to autonomously traverse the room, initiating motor and water flow for efficient floor cleaning. In this mode, the robot adeptly avoids obstacles while methodically tracing its path, ensuring a seamless cleaning process throughout the area. Both modes incorporate safety features, including halting in the presence of nearby objects within the robot’s vicinity and an anti-fall system to detect the edge of flat surfaces for enhanced assurance.
Results & Discussion
The project yielded a successful implementation of an Arduino-based floor cleaning robot, effectively showcasing its autonomous and manual operation modes. The robot demonstrated efficient obstacle avoidance, path tracing, and floor cleaning capabilities, marking a positive outcome for its intended functionality. The scrub motors and sweepers worked very well along with the vacuum and did a decent job at cleaning the floor in most of the areas specially if left on for around 30-40 minutes in the automatic mode. However the form factor could be proved to be challenging to house the vacuum fan and water tank within the main body of the robot and hindered a few low surfaces during operation.


Conclusion & Future Work
In conclusion, the Arduino-based Floor Cleaning Robot represented an innovative and efficient solution for automated floor cleaning. The integration of the controller, motors and sensors in a strategic design fashion enabled the robot to function seamlessly in both automatic and manual modes, avoiding obstacles and providing a thorough cleaning experience showcasing its practical and economic application. However, for future work, enhancements can be made in terms of refining obstacle avoidance algorithms, optimizing water usage for wet cleaning, and exploring more advanced sensor technologies for room mapping like lidars or camera systems. Additionally, integrating on-board machine learning algorithms through TinyML could enhance the robot’s adaptability to different environments, making it a more intelligent and versatile cleaning companion.
Additional Documents
More detains about this project: Github Link.
Guide: –